We encounter liquids all the time. To introduce measuring liquid volume to your students, you may start by asking them what usual ways they encounter liquids. Some may answer that liquid is found in the oceans and seas. Yes! Some may even answer that liquid is experienced when you take a shower or swim in a pool. Correct! Some may answer that liquid is in the water we drink and even in the rain that pours. True!
I’m pretty sure the list of liquid examples can endlessly flow! Before these examples flood the main discussion away, make sure to stay afloat. Let this article be your anchor in teaching liquid volume. It will not just help you explain how to measure liquid volume, but you will also get a little wet with some engaging activities you can do with your students!
First of all, tell your students that the liquids they listed take up space. You can simply explain that these liquids have volume. That’s why they take up some amount of space when they are put in a container. Because liquid volumes take up some amount of space, this space has a specific measurement.
Now, your students know that liquid volume is the measurement of how much space a particular liquid occupies in a container. Next, you will probably be asked how to measure these quantities. The questions will rush like waves: How can I label liquid volume measurements? What do I use to measure liquid volume? What is the liquid volume of my water jug?
Know that, in this article, we are dealing with measuring liquid volume in metric units. You may quickly give a glimpse of liquid volume in terms of the customary units (gallons, quarts, pints, cups, and fluid ounces). However, sail your students to the lesson of liquid volumes in terms of metric units. Milliliters can be labeled for smaller quantities of liquids, while Liters are for more significant amounts of liquid volume.
With that being said, you can engage your students in getting to know liquid volume with the following activities!
Get Scientific!

Measurements include values, but these numbers are not just mathematically interpreted. The act of measuring a particular object is also very scientific. Just as the ruler is for measuring length, there are also measuring devices for getting liquid volume. The examples to be shown are apparatuses commonly found in the school laboratory. If you can demonstrate the equipment personally, make sure to handle them with care because they are made of fragile materials.
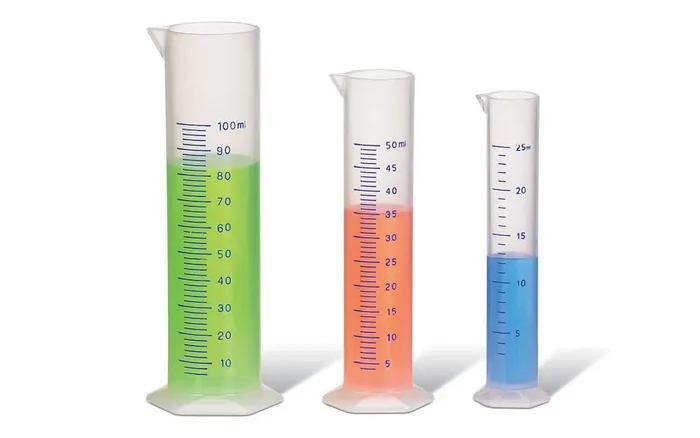
The most common and most precise liquid volume measuring device is the graduated cylinder. It is a cylindrical glass or plastic tube that stands upright. Think of it as the very tall and slim cousin of an ordinary glass of water. It has markings outside that show a calibrated scale. The scale starts from the bottom and graduates increasingly to the top.
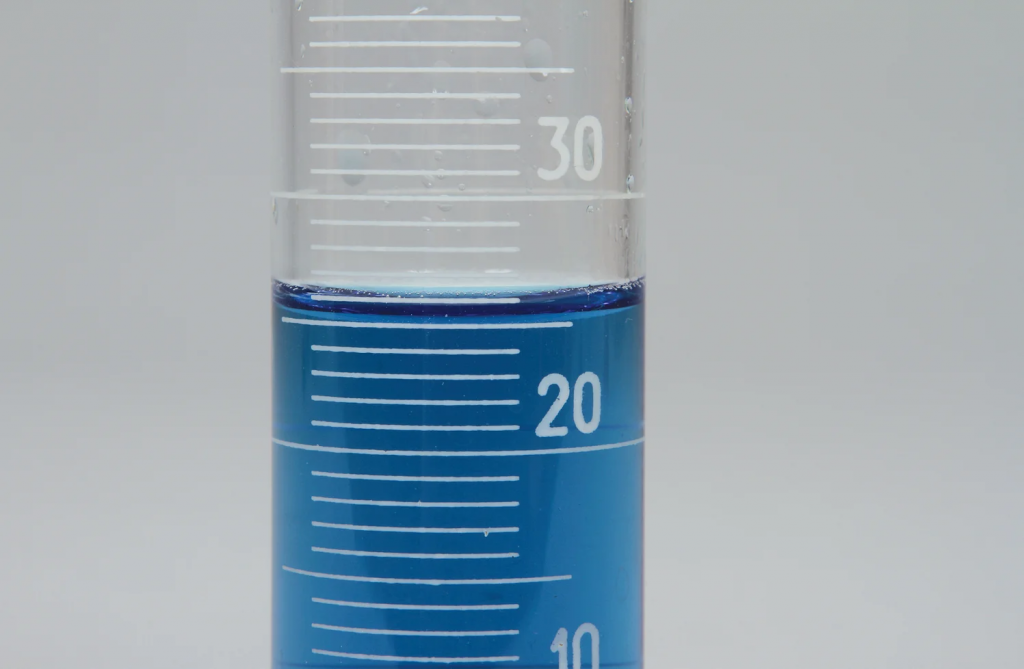
Liquid volume is measured by pouring liquid inside the cylinder and reading the calibrated scale. The line on the scale where the top of the water lies shows the measurement. If your graduated cylinder is made of glass, you may notice that the surface of the top of the water is somewhat curved or shaped like a U. This is called the meniscus. As a general rule, tell your students to read the lower part of the meniscus to get the level of water in the cylinder.
Another liquid volume measuring device is the beaker. Although it is not as precise as the graduated cylinder, you read the liquid level in the same way. The beaker is usually shorter than a graduated cylinder, but it is also stouter than the usual glass of water. It is also marked with levels usually with an interval of 10 or 100. If it is also made of glass, the lower meniscus is used to read the liquid volume measurement. Beakers are better used in pouring liquids from one container to another.

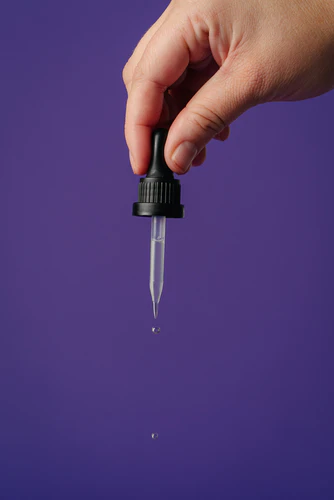
Lastly, you may also find a dropper in the school lab. This apparatus usually measures 1 mL of liquids. It is one of the most fun devices to use in measuring liquid volume. All you have to do is put the spout in any liquid, then press onto the squeezable rubber top. The dropper is usually marked with levels up to 1 mL. Once the dropper is filled with 1 mL of liquid, you can transfer the liquid inside to another container by pressing onto the squeezable rubber top. You can do this multiple times to get the desired measurement of liquid.
Again, great caution is required in handling the equipment mentioned here to avoid breakage and potential injury.
Get Creative!

The apparatus found in the school laboratory may not be ideal for 3rd graders to begin handling. In addition, these devices may not even be easily accessible, whether it be at home or in school. Don’t you worry! You can also create your own measuring device using simple materials.
All you need to have to make yourself a graduated cylinder are 1) any glass or plastic container, 2) any tape or adhesive, 3) a strip of paper, 4) a marker, 5) a medicine dropper that measures 1 mL, and 6) water.
- Make sure your container is clean and dry.
- On any side of the container, tape the strip of paper vertically from the bottom to the top. Make sure to stick it outside not to get wet when you put water in the container.
- Place the container on a flat surface, and you may now begin to fill it up with water.
- Using the dropper, fill the container with 5 mL of water.
- Once there is 5 mL of water in the container, use your marker to draw a horizontal line to signify a 5 mL mark. It is similar to the levels of the scale found in the graduated cylinder.
- Repeat the process of filling the glass with 5 mL of water to mark the strip of paper with intervals of 5.
- You may stop until the level you want. Make sure to label each level with multiples of five.
With those simple materials, you can now let your students measure different liquids they want to measure.
Get Practical!
Did you know that we can still roughly measure liquid volume even without using fancy equipment? It is still okay if you don’t have the materials to create your own makeshift graduated cylinder! Liquid volume measurements are found everywhere, particularly in grocery stores.
Ask your students to check out the contents of their fridge and let them discover that liquid volume measurements can be seen in the ordinary liquid products they have in the fridge. They may even be surprised to discover that differently shaped jars, bottles, and containers might even have the same liquid volume!
It is a practical way of introducing liquid volume measurements without having to use any equipment. You can ask them to list all the liquid products and their measurements. For example, your students may find bottles of water measured to be 500 mL or 1 Liter. Their favorite apple juice boxes could measure 200 mL each. Let them explore at home the many liquid products that are labeled with their corresponding measurements.
If available, students can use empty 1 L or 500 mL water bottles to contain other liquid volumes. A practical activity or homework you can tell your students is to drink 1.5 L (or 1500 mL) of water every day. They can track how much water they drink using these empty water bottles! It’s a practical activity to measure liquid volume and apply and promote it in a healthy way!
FREE Measuring Liquid Volume in Metric Units Worksheets and Resources!
These are all PDF Files. They will open and print easily once downloaded. The Student Edition files are labeled SE, and the Teacher Editions Files are labeled TE. Click the links below to download the different resources.
- 2-6 Assignment SE – Measuring Liquid Volume in Metric Units (PDF)
- 2-6 Bell Work SE – Measuring Liquid Volume in Metric Units (PDF)
- 2-6 Exit Quiz SE – Measuring Liquid Volume in Metric Units (PDF)
- 2-6 Guided Notes SE – Measuring Liquid Volume in Metric Units (PDF)
- 2-6 Lesson Plan – Measuring Liquid Volume in Metric Units (PDF)
- 2-6 Slideshow – Measuring Liquid Volume in Metric Units (PDF)
Get Editable Worksheets and Resources!
To get the Editable versions of these files Join us inside the Math Teacher Coach Community! This is where we keep our full curriculum of 3rd Grade Math Lessons and Activities.
List of member-only editable resources:
- Assignment
- Bell Work
- Exit Quiz
- Guided Notes
- Interactive Notebook
- Lesson Plan
- Online Activities
- Slide Show
If you are a Math Teacher Coach Community, click here to download the resources.